Seed Starting
It is time here in Sioux City to start most flower seeds! Actually, I am about a week late. I never was sure when to start seeds exactly, but after I got Floret Farm's Cut Flower Garden book this year, I quickly learned. I figured out a lot of things that I never knew about planning my garden, choosing seed varieties, and starting seeds. I come from a serious gardening family, many of whom are master gardeners, but I still learned so many new things reading through this book from cover to cover. I cannot recommend it enough. Anyone can start a cutting garden with this book; it is perfect for beginners and pro gardeners alike. I used to google how to start seeds and get all sorts of different opinions, but I have to say it is refreshing and simple to just open up a book and have all the information I need right in front of me – old school style! With book in hand, my kids and I set out on a warm spring afternoon to start three flats of seeds for my cutting garden…..


Other than reading the book in preparation, I had soaked my sweet pea seeds for 24 hours before starting, put my Bells of Ireland seeds in the freezer for 10 days (all of this is recommended in the book), and purchased my materials. The materials are surprisingly simple:
- Seed starting trays with bottom tray and a top plastic dome
- 4” pots for the sweet peas and other vine seeds that need more depth for their roots
- Seed Starter Mix (dirt) for most seeds
- Potting soil for the larger seeds (the sweet peas and other vines)
- Seeds of course—I bought a lot of Floret seeds (available at www.floretflowers.com) again this year because I love all of their special, select varieties that they have trialed on their flower farm. I also bought some from the seed company Renee’s Garden (reneesgarden.com) and Bakers Seeds (rareseeds.com), which I love for their heirloom varieties.
- A bowl to mix the dirt with water before filling the trays


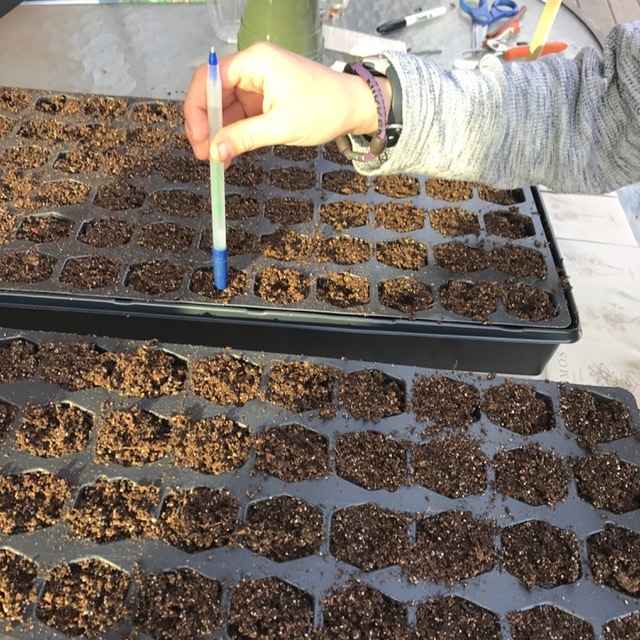
We began by moistening our soil, then filling the trays (and tapping out any air bubbles), placing a little hole with a pen, dropping in 1-2 seeds in each hole, sprinkling on a ¼” of dirt over the seeds, and setting the tray in 1” of water in the bottom tray to fully water them (don’t let them sit in water for any longer than 1 hour). Much more detailed instructions are in the book, but honestly it is that easy. Label them and put the plastic dome on to retain humidity and heat and help the little seeds germinate. You can use a heat mat to keep them warm or put them in a warm place in your home. With the larger vine seeds (sweet pea, cup and saucer, love in a puff, etc), these need more room for their roots, so it is recommended that they be planted in 4” pots with potting soil, and then just put a plastic cup on top of them which creates a humidity dome. That’s it! Then watch as your seedlings appear. Remove the plastic tops once your seeds have sprouted. All the info about how to transition your seeds into your garden and when to do so is in the book. I know, I’m a broken record. But the purpose of this post isn’t so much to teach you how to plant flower seeds but just to inspire you to do so. It saves a lot of money compared to buying all seedlings, and it is such fun to watch the entire life cycle of a flower when you start it from seed.


I will also say that it was easy, but not perfect. I dropped an entire tray on the ground after planting the whole thing, I spilled a cup of water over all the seed packets and blurred the writing, my cats were in the way the whole time, my son actually shot up my plastic tray covers with his bb gun while I was busy planting because he thought they were trash (so I had to cover the hole-ridden tops with plastic wrap). Yes, it was a pretty easy process, but I just want you to have a little reality with this blog. Sometimes I feel like the Julia Child of the flower world. I am admittedly clumsy and my brain always seems to work faster than my body. I break vases while talking on the phone at the shop, spill dirt everywhere, and so on. I simply carry on, clean up, and usually have a good laugh. I try not to let the little stuff bother me. I offer this advice so that if everything doesn’t go perfectly while you are planting your seeds, no worries! Just keep going.

And so I begin the 2017 growing season with great anticipation.
I am particularly excited about my cutting garden this year. What is a cutting garden? Well, it is a garden that you plant for the purpose of cutting flowers to bring in and use in vases (or in my case to use in my floral designs at the flower shop). My aunt was the first person I knew who had a cutting garden (my mom always has amazing perennial flower beds but she prefers her flowers to remain in the garden). I remember that whenever my Aunt went to someone’s house for dinner, or met a friend for lunch, or met with a teacher, she would have me run out and cut some flowers to tuck into a jar and take with us. I just loved the idea of having a seemingly unending supply of flowers that I didn’t have to buy and could just cut and give people whenever we went somewhere. That planted the “seed” for my desire to have a cutting garden.
I planted my first cutting garden when I moved onto our acreage. Actually, it used to always be part vegetables and part flowers. When I opened Honeysuckle Hollow three years ago, it became mostly flowers and herbs with a few tomatoes and cucumbers tucked in for salads at night. Yes, I do have some perennial flower beds in the yard that I enjoy looking at, but my favorite garden is my cutting garden, which is outside of the yard behind the wild grapevine covered fence. My yard is too shady to grow flowers very well, so I put my cutting garden into the full sun of the pasture. When I walk through a rickety old wooden gate that someone before me made, I pass from the shade of my yard into the sunny, hot space of my cutting garden. It is like entering a secret garden, and I am usually the only person that takes the time to wander through this garden daily. It is out of the way and overlooked by guests and even my family. It is a perfect place for a cutting garden. It doesn’t have to look good; it is there to grow flowers and for me to cut flowers to my heart’s desire. Honestly, I let it get a little wild as summer trails on with our busy work and travel schedules, but I never mind – It is hidden. Think overgrown cottage garden. That’s what mine looks like. It is a place filled with little victories and plenty of failures. I try new flowers, some work and some don’t. Sometimes the flowers are amazing, and other years the weeds seem to win. Each year it is remarkably different based on the weather, the varieties I grow, what we have going on in life… but it is always there. I can’t wait to find out what it will look like this year!
Happy gardening!